ImageVault Connect for Adobe
ImageVault Connect for Adobe is an extension which allows you to access all your ImageVault assets directly from supported Adobe software.
Prerequisites
- ImageVault 5.10 or later
- Supported Adobe software:
- Adobe InDesign CC
- Adobe Photoshop CC
- License for "ImageVault Connect for Adobe"
Supported Adobe versions
We aim to support the current and previous major version of Adobe software, but other combinations may be possible due to the versioning and API lifetimes of Adobe products.
Installing
To install, perform the following actions:
- Download ImageVault Connect for Adobe from Adobe Exchange
- Restart the Adobe application
- Access the extension through the extensions dialogue:
- InDesign: Window -> Extensions -> ImageVault
- Photoshop: Window -> Extensions (legacy) -> ImageVault
Configuring
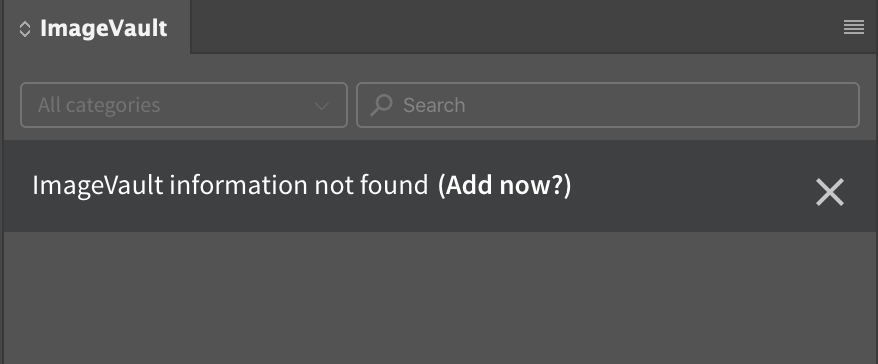
When the extension is opened, you will be prompted to add some ImageVault information. By clicking the link Add now, the extension settings will open. These settings can also be reached from the panel menu in the top right corner.

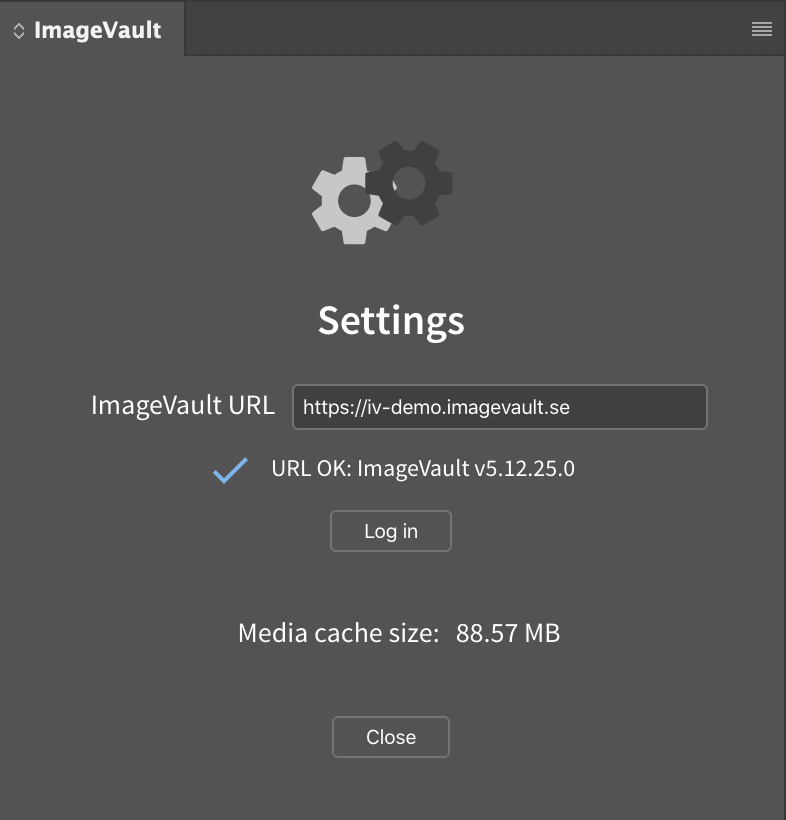
Enter the URL to your ImageVault service in the input field and press enter. The extension will now try to connect to the ImageVault service. When the URL is verified as OK, the log in button will become visible.

Once you press the log in button, a browser will open where you need to enter your username and password to log in. The pin activation will automatically be triggered and in a few seconds, you will be notified that it is ok to close the browswer.

You are now logged in and can start using your ImageVault assets!
Using
Use the ImageVault panel to search for and filter out any media file you want to use. Hovering over a thumbnail in the panel reveals a list of actions, for example previewing, opening or inserting a media into your workspace.
The basic functionality of the ImageVault panel should be identical across Adobe products, but different actions or extended functionality may be available depending on the Adobe software used.
Troubleshooting
The addon must be able to connect to, and perform various HTTP request with, an existing ImageVault instance. If HTTP communication between the machine running the addon and the ImageVault instance is hindered by network or firewall rules, the addon will not function properly. HTTPS communication should use valid and trusted certificates.
The addon needs to have permission to write and modify files on disk. It uses a specific directory as a working directory, named imagevault-indesign, located in the user data directory for the logged in user (typically C:\USERNAME\AppData\Roaming on Windows and /users/USERNAME/Library/Application Support on Mac). Make sure that the Adobe process has permissions to create and modify files in this location, if this is hindered by anti virus or similar software the addon will not function properly.
Running basic diagnostics
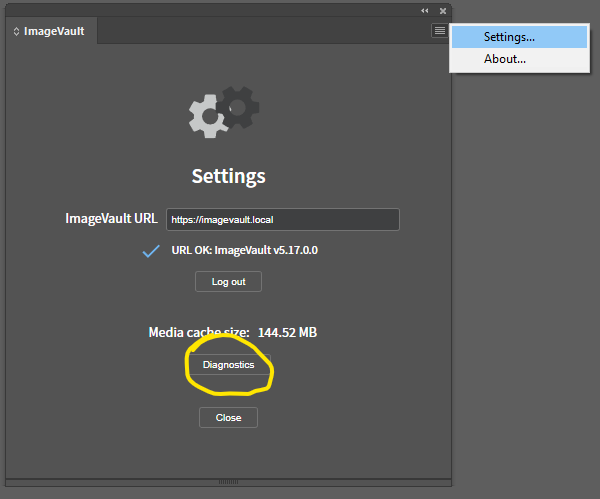
When logged in, you can perform a quick diagnostic check to make sure the ImageVault communication and file permissions are working as expected from within the addon. The diagnostics dialog can be opened from the settings dialog by clicking the addon panel top menu, selecting Settings... and then clicking the Diagnostics button.

In the diagnostics dialog, click the Run diagnostics button to perform a series of tests.
If the diagnostics fail, or there is some other issue with the addon, log files are written (see below) with information for further troubleshooting.
For more information and troubleshooting about Adobe extensions in general, visit Troubleshoot Adobe exchange extensions.
Log files
The addon has two types of logging, a custom file logger and the default logging for Adobe extensions, the CEP engine logger.
Custom file logger
The custom log file contains any errors (by default) generated during normal addon usage and is generally the log to use for troubleshooting the addon. The log file is located in the operating system's temporary files folder, determined by the TEMP environment variable on Windows and TMPDIR or TMP on Mac.
The log files are named imagevault-indesign.log for InDesign and imagevault-photoshop.log for Photoshop.
If required, you can enable the more verbose debug logging level by creating and setting the environment variable IMAGEVAULT_ADOBE_DEBUG_LOG to value 1 and restarting the Adobe application.
Note: Do not keep debug logging enabled for long periods in production systems, only use it for troubleshooting.
CEP engine logging
The CEP engine logging contains any errors from the CEP extension engine, such as problems initializing or installing the addon, and any system level errors. The CEP engine creates the following log files:
CEPHtmlEngine10-<APP>-<VERSION>-com.meriworks.imagevault.panel.logCEPHtmlEngine10-<APP>-<VERSION>-com.meriworks.imagevault.panel-renderer.logCEP10-<APP>.log
Where <APP> is the Adobe application (IDSN for InDesign, PHSP/PHXS for Photoshop) and the <VERSION> of the software.
CEP engine log file location
Windows: The temporary files folder (typically C:\Users\<USERNAME>\AppData\Local\Temp)
Mac: /Users/<USERNAME>/Library/Logs/CSXS
Adjusting the CEP engine log level
The default log level is set to "Error", however, this may be changed if needed.
Note: Increasing log level will drastically decrease loading time and performance of extension - not recommended to keep this enabled in production.
The following log levels exist:
0 - no logging
1 - Error
2 - Warn
3 - Info
4 - Debug
5 - Trace
6 - All
Adjusting level on Windows
Change the key LogLevel in registry location HKEY_CURRENT_USER/Software/Adobe/CSXS.10
Adjusting level on Mac
Change /Users/<USERNAME>/Library/Preferences/com.adobe.CSXS.10.plist to the level you want, e.g:
defaults write com.adobe.CSXS.10 LogLevel 4 for Debug.